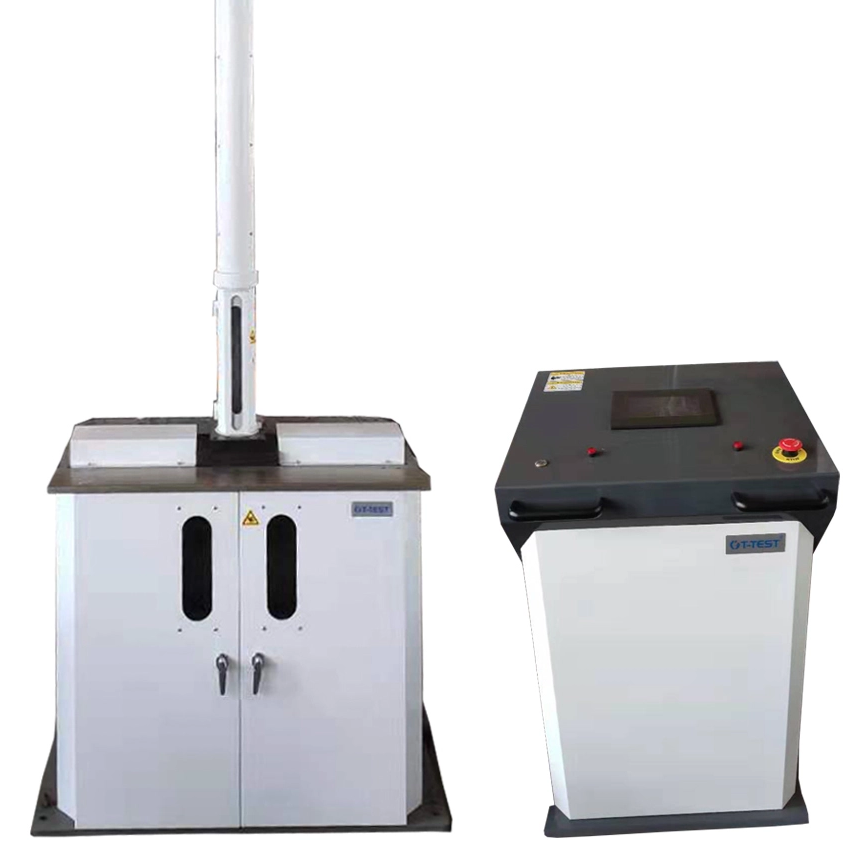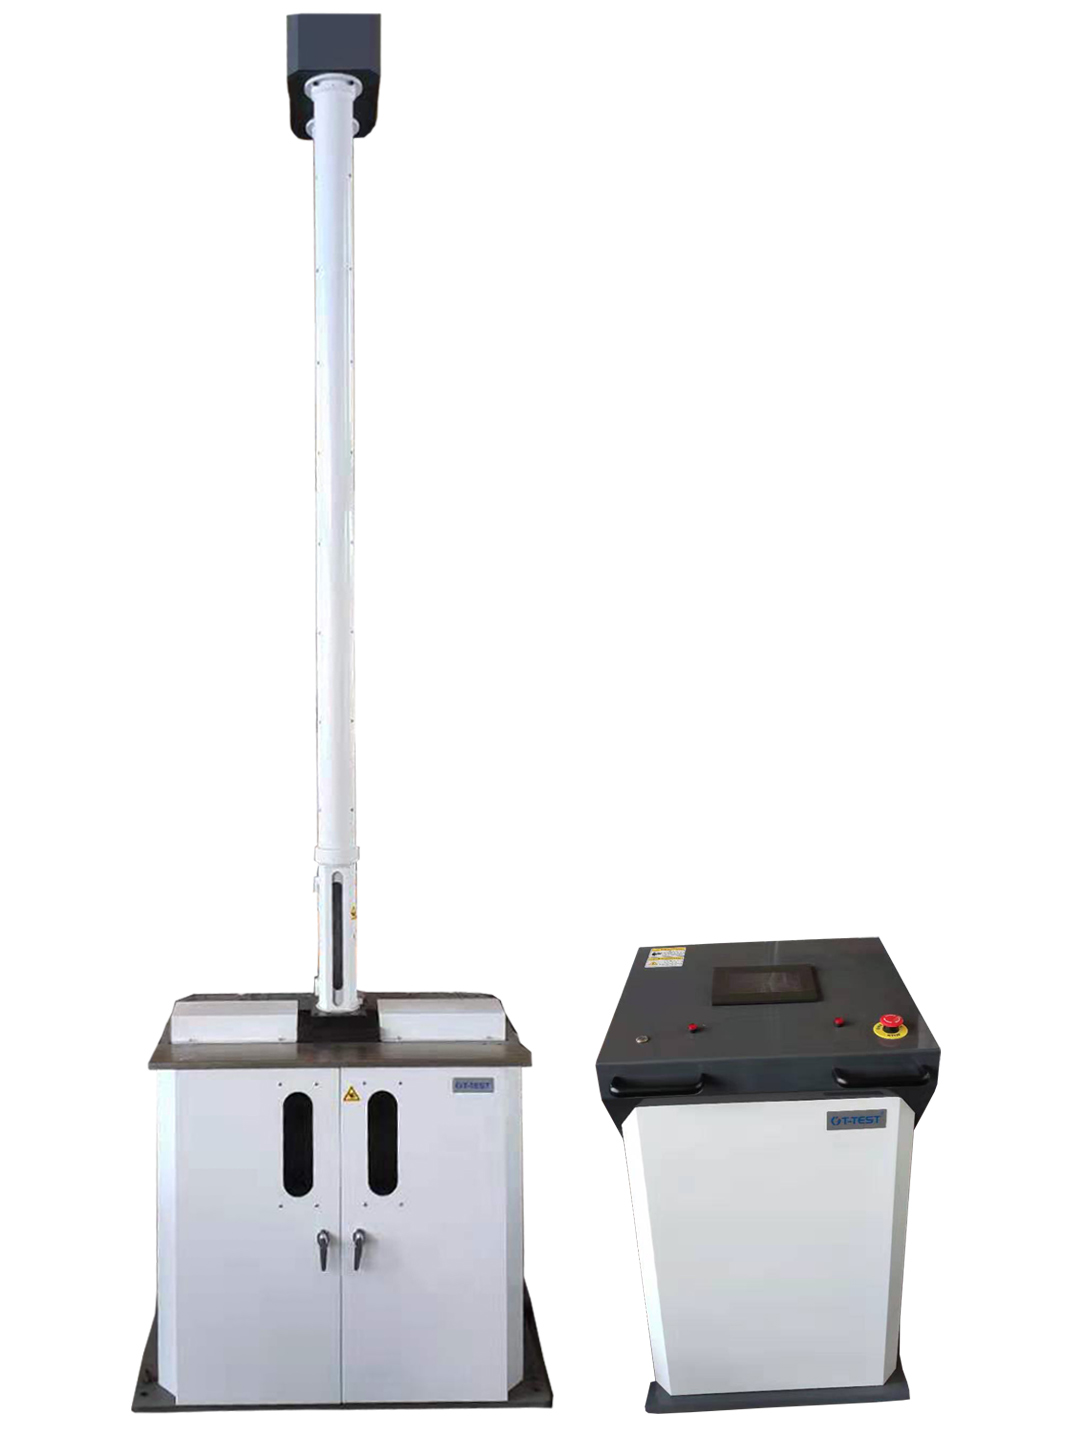
Have you ever wondered how materials withstand sudden forces? Impact testing holds the answer. This essential process evaluates material toughness and durability. In this article, you'll learn about impact testing's definition, purpose, and importance. We'll also explore the impact tester, a crucial tool in assessing material resilience. Discover how impact testing ensures safety and reliability across various industries.

Types of Impact Testing
Impact testing involves several methods to evaluate how materials respond to sudden forces. Each type uses specific equipment and procedures, offering unique insights into material toughness and durability. Here are the main types of impact testing commonly used with an impact tester or impact testing machine:
Charpy Impact Testing
The Charpy impact test is one of the most widely used methods. It uses a pendulum impact tester, often called a Charpy impact tester or Charpy test machine. A notched specimen is placed horizontally and struck by a swinging pendulum hammer opposite the notch. The energy absorbed by the specimen during fracture is measured by the drop in the pendulum’s height after impact. This test is especially popular for metals and thermoplastics and helps determine toughness and ductile-to-brittle transition temperature. Standards like ASTM E23 govern this test.
Izod Impact Testing
Similar to the Charpy test, the Izod impact test uses a pendulum impact testing machine but differs in specimen orientation and where the pendulum strikes. The test specimen is fixed vertically, and the pendulum strikes the notched side directly. The Izod test is common for plastics and polymers but can also be applied to metals. It measures impact strength and is standardized under ASTM D256. An izod testing machine or izod impact tester is typically used.
Drop Weight Testing
Drop weight testing involves dropping a guided weight from a set height onto a simply supported specimen. Unlike pendulum tests, energy absorption can't be directly calculated from pendulum height but rather by observing whether the specimen fractures, deforms, or cracks. This method is suitable for thicker materials and helps evaluate the ductile-to-brittle transition temperature. It’s widely used in industries requiring safety-critical components. Drop weight impact tests provide pass/fail results rather than precise energy values.
Puncture Impact Testing
Puncture impact testing measures a material's resistance to penetration by a pointed object. The test uses a puncture probe driven into the specimen at a controlled speed. The force required to puncture the material is recorded, indicating toughness and durability. This test is crucial for packaging, medical devices, and protective gear. Puncture impact testing complements other impact tests by focusing on localized damage resistance.
Understanding the Impact Tester
Components of an Impact Tester
An impact tester, whether a pendulum impact tester like a Charpy impact tester or an Izod testing machine, consists of several key components that work together to measure a material’s toughness accurately. The main parts include:
Pendulum or Hammer: This weighted arm swings or drops to strike the test specimen. In a pendulum impact tester, a pendulum hammer is released from a fixed height to swing through the specimen.
Specimen Holder or Fixture: It securely holds the test specimen in place during the test. For Charpy impact test machines, the specimen is supported horizontally at both ends, while Izod testers hold the specimen vertically on one end.
Notch in Specimen: Though not a part of the machine, the test specimen usually has a V-shaped notch to concentrate stress and ensure fracture occurs at a consistent location.
Energy Measurement System: This system measures the energy absorbed by the specimen during impact. For pendulum testers, this is often done by measuring the height difference of the pendulum before and after impact.
Release Mechanism: Holds the pendulum or hammer at the starting height until released to strike the specimen.
Display or Readout: Shows the energy absorbed or impact strength, often in joules or foot-pounds.
These components work in unison to provide reliable, repeatable results for impact testing equipment users.
How an Impact Tester Works
The basic operation of an impact tester involves releasing a weighted pendulum or dropping a guided weight onto a notched specimen. Here’s a simplified step-by-step process:
Specimen Preparation: A test specimen with a precisely machined notch is prepared and mounted in the specimen holder.
Setting the Pendulum or Weight: The pendulum hammer or drop weight is raised to a predefined height, storing potential energy.
Release: The pendulum or weight is released, converting potential energy to kinetic energy as it swings or falls.
Impact: The pendulum or weight strikes the specimen at the notch, causing it to fracture or deform.
Energy Measurement: The energy absorbed by the specimen is determined by measuring the pendulum’s height after impact or by other sensors in drop weight testers.
Result Interpretation: The absorbed energy indicates the material’s impact toughness or strength.
This process is standardized under various testing standards to ensure consistency and reliability.
Choosing the Right Impact Tester for Your Needs
Selecting the appropriate impact testing machine depends on several factors:
Material Type: Metals often use Charpy impact testers or charpy impact test machines, while plastics and polymers are better suited for Izod testing machines.
Specimen Size and Shape: The size and shape of your test specimens can influence the choice between pendulum and drop weight testers.
Required Data: If precise energy absorption values are needed, pendulum impact testers are preferred. For pass/fail evaluations, drop weight testers may suffice.
Industry Standards: Compliance with relevant standards (like ASTM E23 for metals or ASTM D256 for plastics) may dictate the type of impact tester required.
Budget and Maintenance: Consider the initial cost, ease of maintenance, and calibration needs of the impact testing equipment.
Consulting with manufacturers or testing experts can help identify the best impact tester to match your testing goals.
Maintenance and Calibration of Impact Testers
Regular maintenance and calibration are crucial to keep impact testers accurate and reliable:
Calibration: Periodic calibration against certified standards ensures the pendulum height, energy measurement, and release mechanisms function correctly.
Inspection: Routine checks for wear on the pendulum hammer, specimen holders, and release mechanisms prevent errors.
Cleaning: Keeping the machine clean from dust and debris helps maintain smooth operation.
Lubrication: Proper lubrication of moving parts reduces friction and wear.
Software Updates: For digital impact testers, keeping software and firmware updated ensures optimal performance.
Following manufacturer guidelines for maintenance and calibration helps avoid inconsistent results and extends the lifespan of your impact testing machine.
Applications of Impact Testing
Impact testing plays a vital role across many industries by helping to assess the toughness and durability of materials used in various applications. Using an impact tester or specialized impact testing equipment, manufacturers and engineers can ensure their products meet safety and performance standards. Below, we explore key industries where impact testing is essential.
Automotive Industry
The automotive sector relies heavily on impact testing to evaluate components’ ability to withstand collisions and sudden forces. Impact testing machines, including Charpy impact testers and drop weight testers, help assess metals, plastics, and composites used in car bodies, bumpers, and interior parts. For example, drop weight testing simulates crash scenarios to verify energy absorption and deformation characteristics. This testing ensures vehicles meet safety regulations and protect passengers during accidents.
Aerospace Industry
In aerospace, materials face extreme conditions such as bird strikes or debris impacts. Charpy impact test machines and pendulum impact testers are common tools to measure the toughness of aircraft metals and composites. Drop weight testing also evaluates damage tolerance of critical components like fuselage panels and landing gear. These tests ensure aircraft parts maintain structural integrity under sudden impacts, enhancing flight safety.
Construction Industry
Structural materials in construction, such as steel and concrete, must endure dynamic loads from natural events like earthquakes or storms. Charpy impact testers are widely used to measure the toughness of construction steel. Impact testing equipment helps engineers select materials that resist brittle fracture and improve building resilience. This testing supports safer infrastructure and prolongs the lifespan of bridges, buildings, and other structures.
Consumer Goods
In the consumer goods sector, impact testing verifies the durability of plastics, polymers, and packaging materials. Izod impact test machines and puncture impact testers are often used to check products like electronic casings, household appliances, and protective packaging. These tests ensure items can withstand drops, knocks, or punctures during use and transport. Reliable impact testing helps manufacturers maintain product quality and customer satisfaction.
Benefits of Impact Testing
Impact testing offers several crucial advantages that help industries ensure the safety, quality, and performance of materials and products. Using an impact tester or impact testing machine provides valuable data for engineers and manufacturers to make informed decisions. Below, we explore the primary benefits of impact testing.
Ensuring Material Safety
One of the most important benefits of impact testing is confirming that materials can withstand sudden forces without catastrophic failure. Impact testers, such as the Charpy impact tester or pendulum impact tester, measure the energy a material absorbs before fracturing. This data helps identify brittle materials that may crack under shock loads, preventing potential safety hazards in real-world applications.
For example, in construction, impact testing ensures steel beams resist fracture during earthquakes or heavy impacts. In automotive manufacturing, impact testing machines verify that metal and plastic components can endure collisions, protecting passengers. By assessing impact toughness, manufacturers reduce the risk of product failures that could lead to accidents or injuries.
Optimizing Product Design
Impact testing also plays a key role in product design optimization. Engineers use impact test results to select materials with the right balance of strength and toughness. An impact tester provides precise measurements of impact strength, aiding in the comparison of different materials or design modifications.
For instance, a charpy impact test machine can help determine if a new alloy offers better energy absorption than a previous version. Similarly, an izod testing machine measures the impact resistance of plastics used in consumer goods, guiding designers to improve durability without adding unnecessary weight or cost. This iterative testing process leads to safer, more efficient, and cost-effective products.
Quality Control and Compliance
Regular impact testing is essential for maintaining consistent product quality and meeting industry standards. Many sectors require materials to pass specific impact strength thresholds established by standards like ASTM E23 for metals or ASTM D256 for plastics. Using certified impact testing equipment, such as a charpy impact machine or izod impact tester, manufacturers can verify that production batches meet these criteria.
This quality control reduces the risk of defective products reaching customers and helps companies comply with regulatory requirements. For example, automotive suppliers rely on impact testing equipment to certify that parts meet ISO 8256 standards. Consistent testing ensures reliability and builds customer trust.
Challenges in Impact Testing
Impact testing is a valuable tool, but it comes with some challenges that can affect the accuracy and usefulness of results. Understanding these challenges helps users of impact testers and impact testing machines improve testing reliability and interpret data correctly.
Limitations of Current Testing Methods
While impact testing equipment like the Charpy impact tester or pendulum impact tester provides essential data on material toughness, these tests have inherent limitations. The tests simulate sudden forces but do not fully replicate real-world conditions. Factors such as varying impact angles, multiple simultaneous forces, environmental influences like corrosion, and cyclic loading are not captured by standard impact tests. This means the results may not perfectly predict material behavior in actual service conditions.
Additionally, some materials, especially brittle ceramics or composites, respond unpredictably to impact tests, making it difficult to assess their toughness accurately. Impact testing machines typically measure energy absorbed during fracture, but they don't account for complex failure modes or microstructural changes that occur under real impacts.
Interpreting Test Results
Interpreting data from an impact tester requires expertise. The energy absorbed, measured in joules or foot-pounds, indicates toughness but doesn’t always tell the full story. For example, two materials may absorb similar energy but fail differently—one might crack suddenly, while another deforms plastically. Understanding these nuances is critical.
Moreover, factors like specimen notch quality, temperature during testing, and testing speed influence results. The Charpy impact test machine or izod testing machine readings must be analyzed in context, considering these variables. Misinterpretation can lead to poor material selection or unsafe product designs.
Ensuring Consistent Testing Conditions
Consistency is key for reliable impact testing. Small variations in test specimen preparation, notch placement, or test setup can cause significant result differences. For instance, a slight change in notch depth or pendulum release height on a Charpy tester can skew energy absorption values.
Impact testing equipment often includes features like fixed locking points for pendulum release and precise specimen fixtures to minimize variability. Regular calibration and maintenance of impact testers are essential to maintain consistent performance. Without strict adherence to standardized test procedures, results may lack repeatability and comparability.
Future of Impact Testing
Advancements in Impact Tester Technology
Impact testing technology continues to evolve, improving accuracy, efficiency, and ease of use. Modern impact testers now often feature digital displays, automated data acquisition, and advanced sensors that capture detailed impact event data. For example, some charpy impact testers and pendulum impact testers integrate high-resolution load cells and accelerometers. These enhancements allow precise measurement of impact energy, force, and specimen deformation.
Additionally, innovations in specimen gripping and release mechanisms reduce variability, ensuring more consistent test results. Automated specimen handling and testing cycles are becoming common in high-throughput laboratories. This automation speeds up testing while maintaining strict adherence to standards like ASTM E23 and ASTM D256.
Moreover, impact testing machines increasingly support multiple test methods in one unit, such as combining Charpy and Izod impact tests. This versatility helps labs save space and costs while expanding testing capabilities.
Emerging Standards and Regulations
As materials and applications diversify, new impact testing standards are emerging to address specific needs. Regulatory bodies and industry groups continuously update standards to reflect technological advances and safety requirements.
For instance, standards now better accommodate composite materials and polymers, which behave differently under impact compared to metals. New protocols also focus on environmental factors such as temperature and humidity, which affect impact toughness.
Global harmonization efforts aim to align standards across regions, simplifying compliance for multinational manufacturers. Standards like ISO 148-1 and ASTM D6110 are regularly revised to incorporate the latest research findings and testing methods.
In addition, specialized standards for industries such as aerospace, automotive, and medical devices are evolving to include more stringent impact testing requirements. These updates ensure materials meet safety and performance criteria under real-world conditions.
Impact of Digitalization on Testing Processes
Digitalization is transforming impact testing by enabling smarter data management and analysis. Modern impact testers often connect to computers and cloud platforms, allowing seamless data transfer and storage. This connectivity supports traceability, quality control, and regulatory compliance.
Advanced software tools analyze impact test data in real time, providing insights beyond simple energy absorption values. For example, software can model fracture behavior or predict material performance under different conditions. Integration with finite element analysis (FEA) programs helps engineers simulate impacts before physical testing.
Digital records facilitate auditing and reporting, reducing paperwork and human errors. They also enable remote monitoring and control of impact testing machines, improving lab efficiency.
Furthermore, machine learning and artificial intelligence are beginning to assist in interpreting complex impact test data. These technologies can detect patterns and anomalies that might be missed by manual analysis, enhancing decision-making.
Conclusion
Impact testing evaluates material response to sudden forces through methods like Charpy and Izod tests. It's crucial across industries for safety and quality. These tests help ensure materials meet standards and perform as needed. GT-TEST offers advanced impact testers, providing accurate, reliable results. Their equipment supports diverse testing needs, enhancing safety and compliance. By choosing GT-TEST, industries can optimize material selection and product design, ensuring robust, high-quality outcomes.
FAQ
Q: What is an impact tester used for?
A: An impact tester is used to evaluate the toughness and durability of materials by measuring the energy absorbed during a sudden impact. It helps determine how materials respond to forces, assisting in material selection and safety assessments.
Q: How does a Charpy impact tester differ from an Izod testing machine?
A: A Charpy impact tester strikes a horizontally placed specimen, while an Izod testing machine hits a vertically fixed specimen. Both measure impact strength but differ in specimen orientation and pendulum strike location.
Q: What types of materials can be tested using an impact testing machine?
A: Impact testing machines can test metals, plastics, polymers, and composites. The choice of machine, such as a Charpy impact test machine or Izod tester, depends on the material type and desired data.
Q: Why is regular calibration of impact testing equipment necessary?
A: Regular calibration ensures that the impact tester provides accurate and reliable measurements. It helps maintain consistency in test results, preventing errors that could affect material evaluation and safety.
Q: What are the benefits of using a pendulum impact tester?
A: Pendulum impact testers, such as Charpy and Izod testers, provide precise energy absorption measurements, aiding in material toughness assessment. They are essential for optimizing product design and ensuring compliance with industry standards.


